 Join Slack
Ubuntu SwitchDev Switch Initial Setup
Note
Further installation requires a Console and Internet connectivity via management port!
If the switch has pre-installed network operating system (NOS), it needs to be uninstalled first.
NOS Uninstall (if pre-installed)
To uninstall the current NOS, access ONIE from the GRUB menu and select the Uninstall OS option.
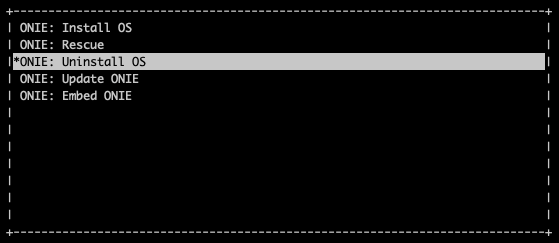
Once it’s done, the switch will automatically reboot and get ready for the installation of the Ubuntu SwitchDev.
NOS Install
If there is no DHCP in the management network, stop the onie-discovery service and configure an IP address and default gateway manually.
onie-discovery-stop
ip addr add <management IP address/prefix> dev eth0
ip route add default via <gateway of the management network>
echo "nameserver <DNS server address>" > /etc/resolv.conf
Install Ubuntu SwitchDev using the Netris customized image:
onie-nos-install http://downloads.netris.ai/netris-ubuntu-18.04.1.bin
Default username/password
netris/newNet0ps
Set up the Out-of-Band (OOB) Management.
Open the network interfaces file and add the IP address and other required details.
sudo vim /etc/network/interfaces
# The loopback network interface
auto lo
iface lo inet loopback

# The primary network interface
auto eth0
iface eth0 inet static
        address <management IP address/prefix length>
        gateway <gateway of management network>
        dns-nameserver <dns server>

source /etc/network/interfaces.d/*
sudo ifreload -a
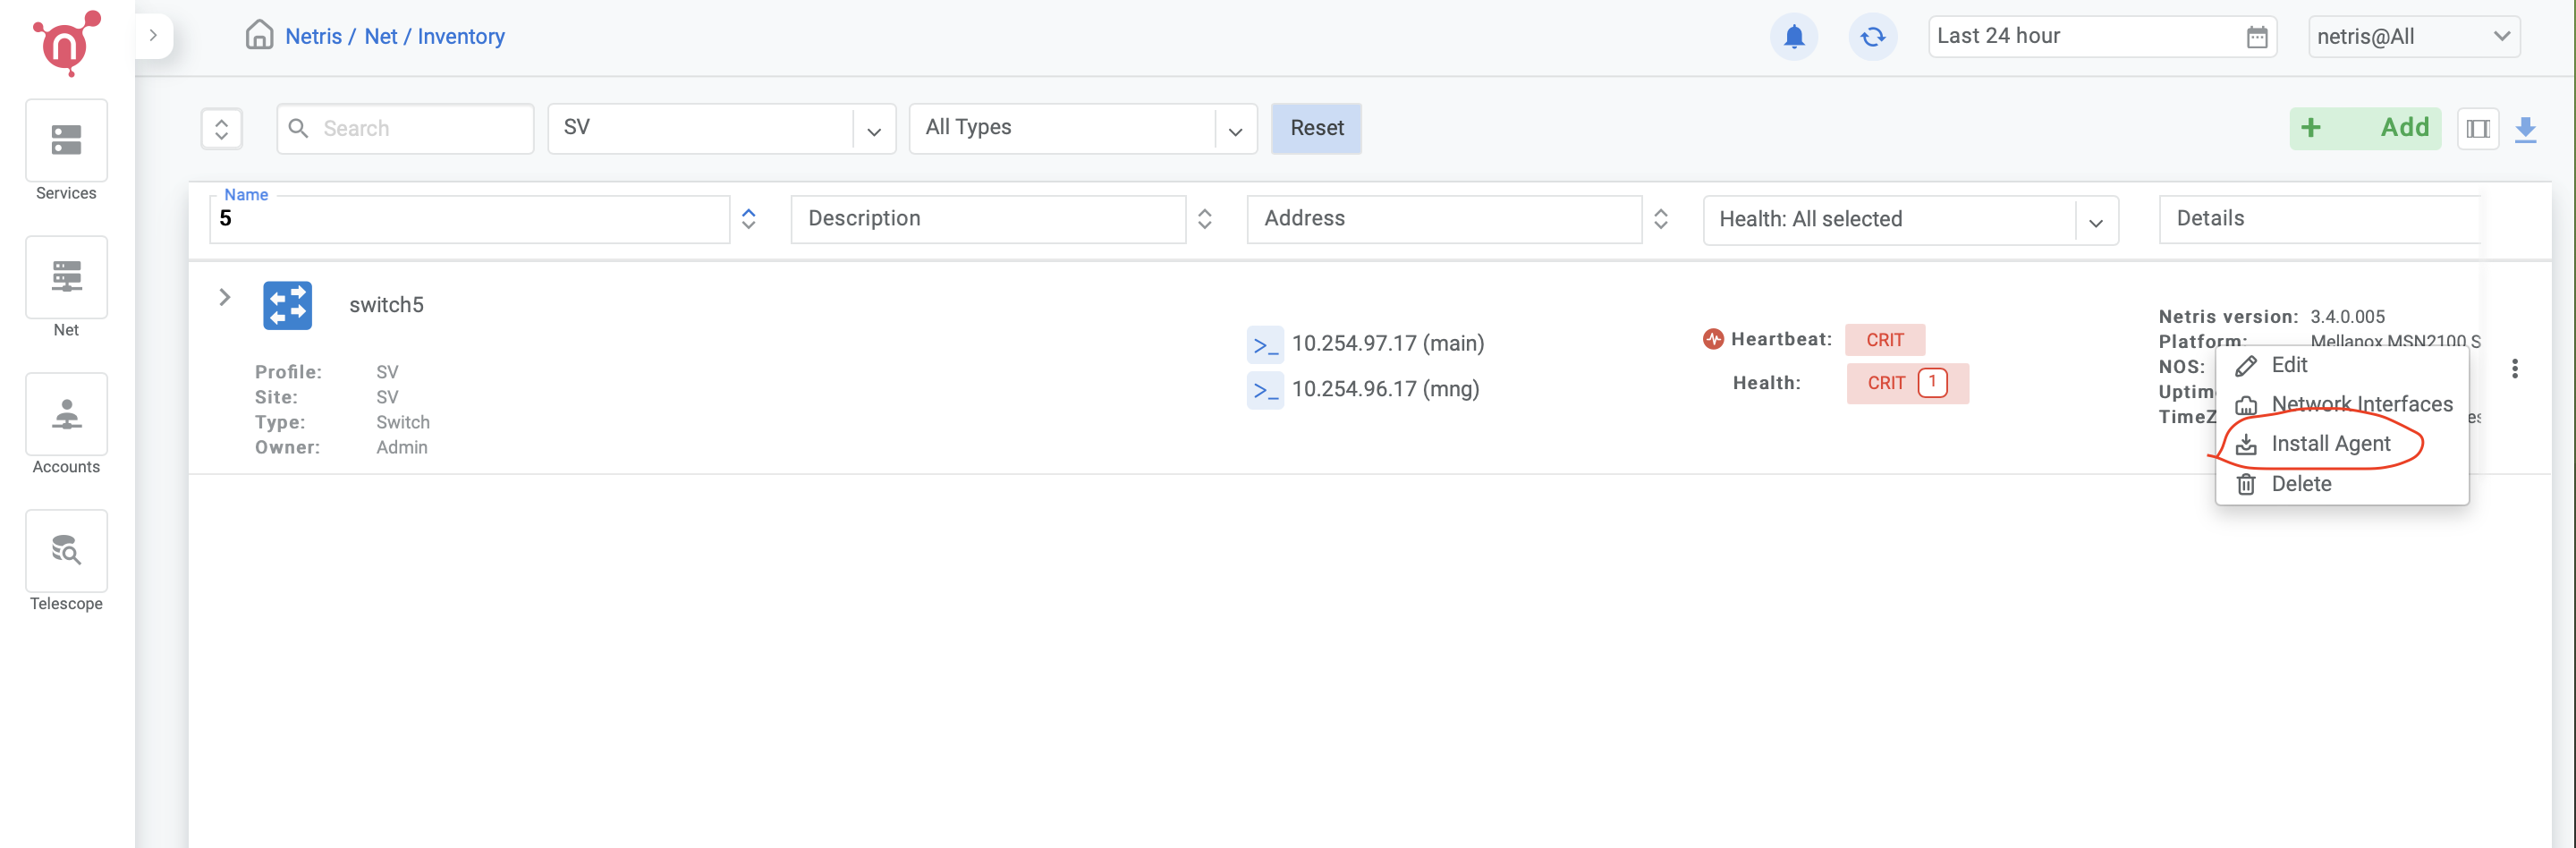
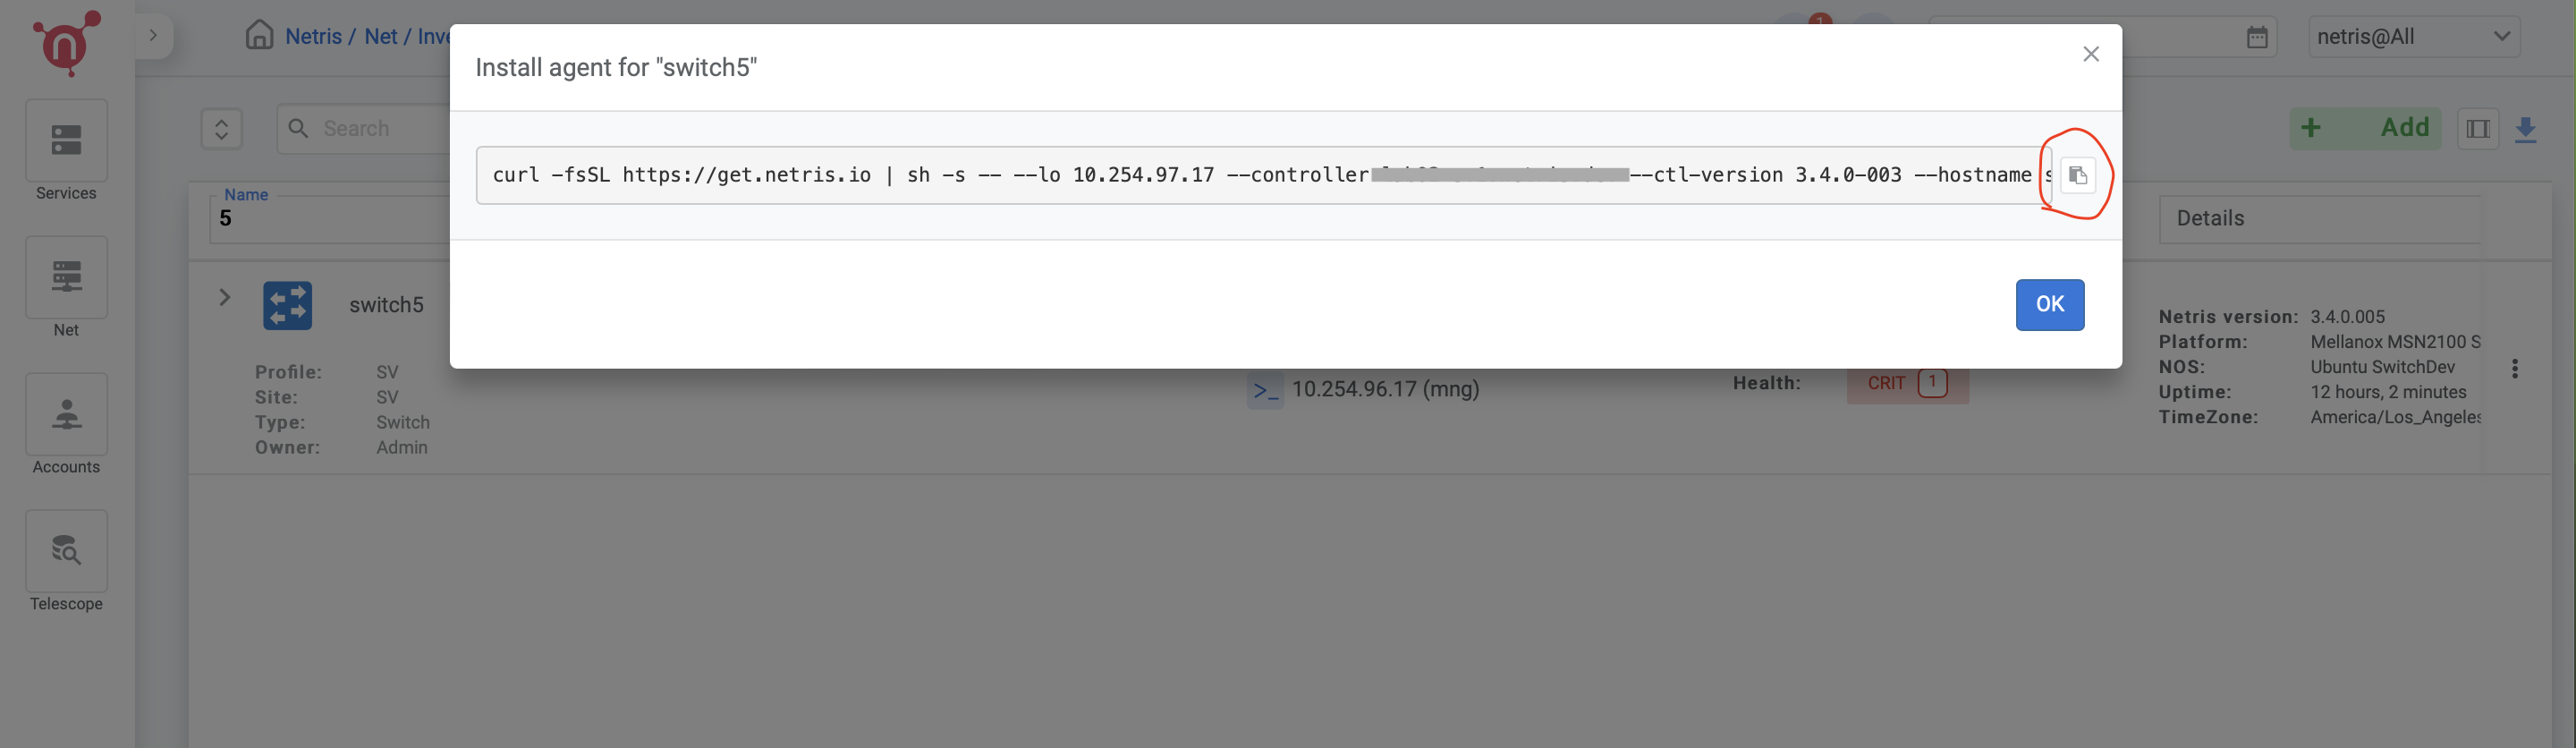
Netris agent installation.
Navigate to the Net–>Inventory section and click the three vertical dots (⋮) on the right side of the switch you are provisioning. Then click Install Agent and copy the one-line installer command to your clipboard.
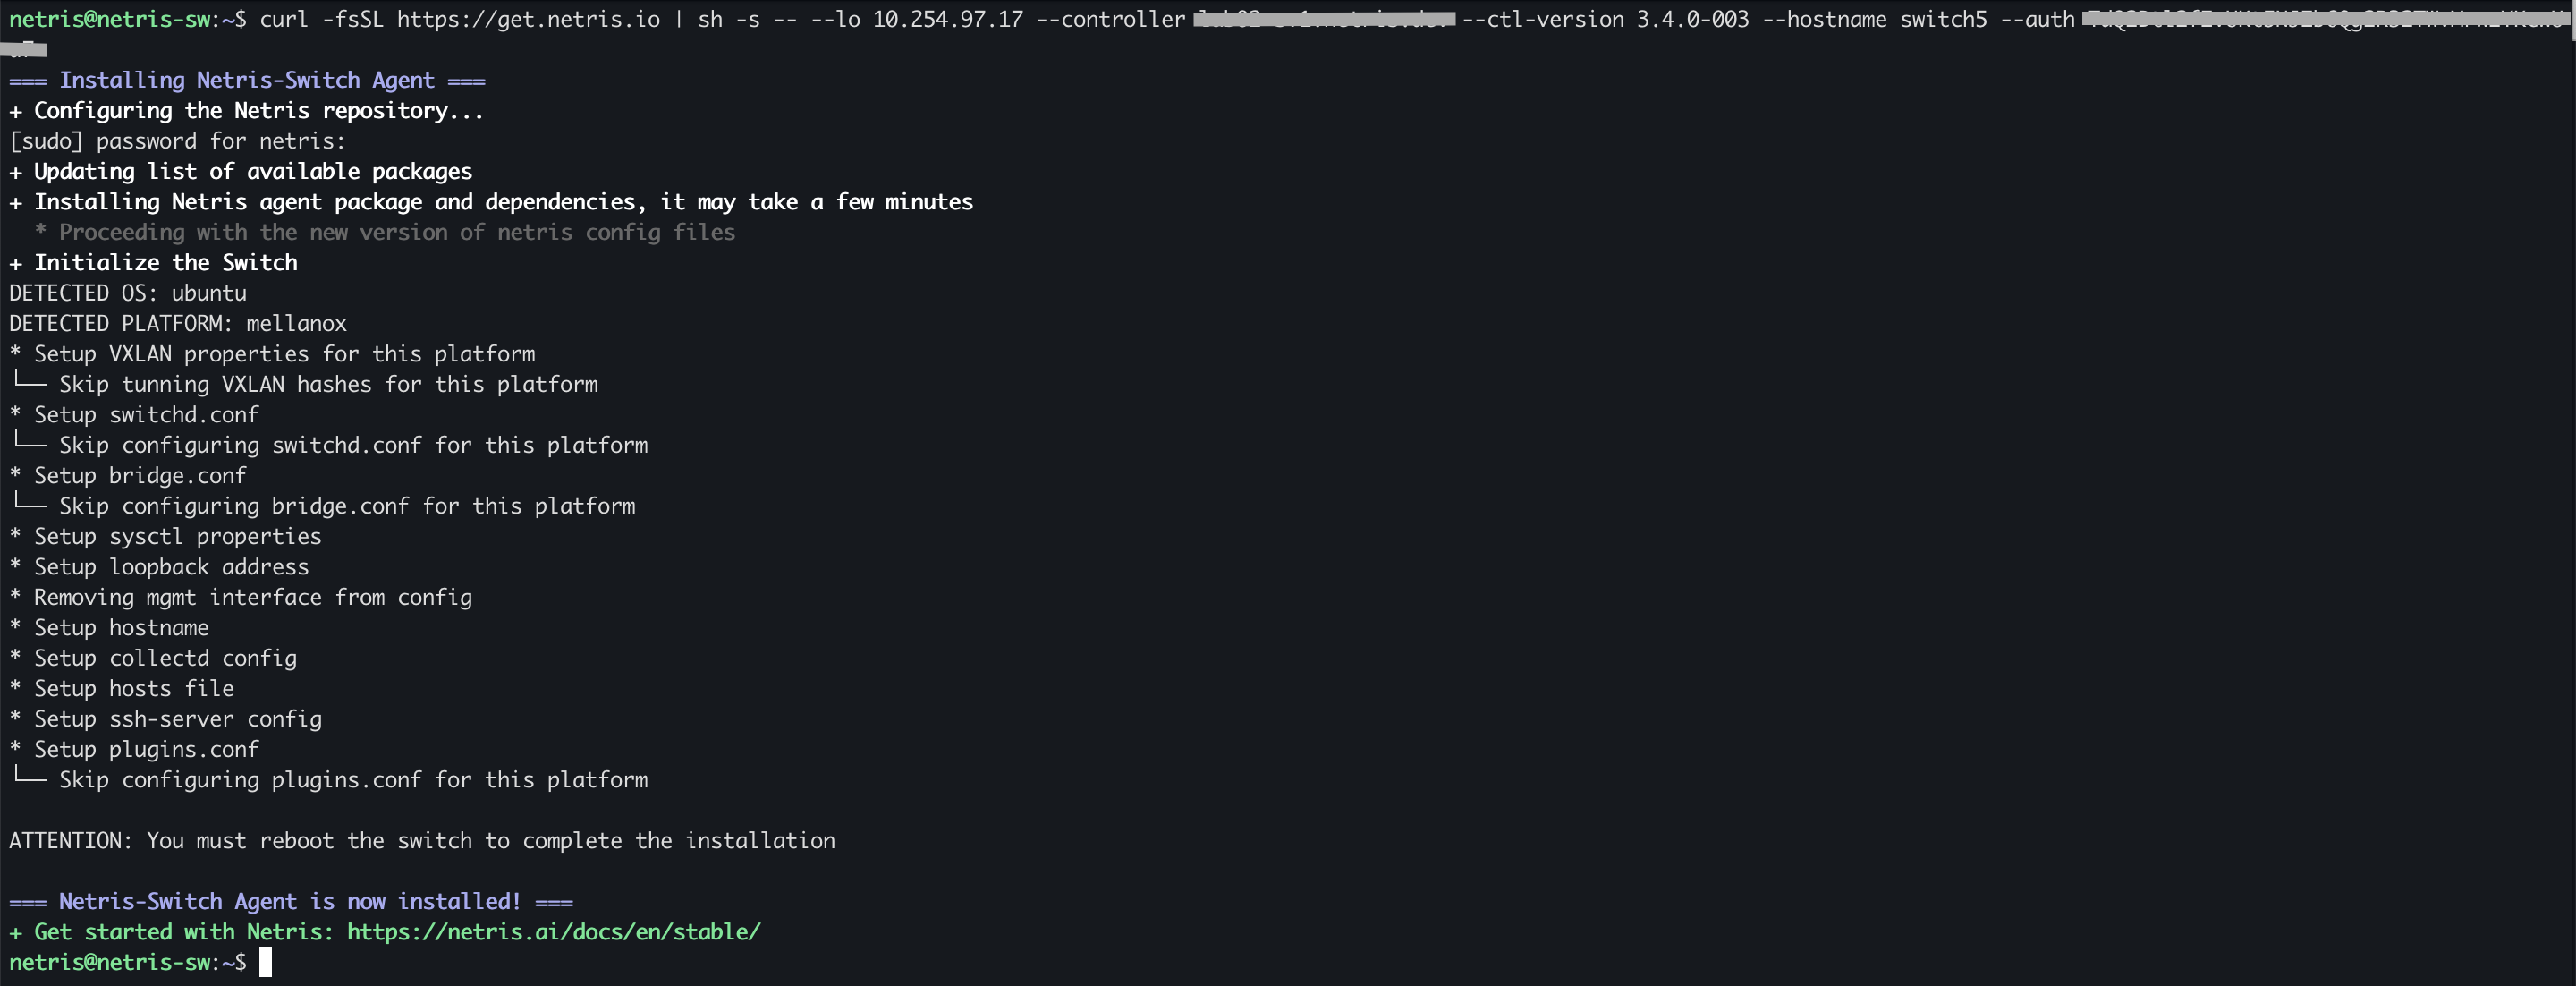
Reboot the switch
sudo reboot