 Join Slack
Dell SONiC Switch Initial Setup
Note
Further installation requires a Console and Internet connectivity via the management port!
If the switch has pre-installed network operating system (NOS), it needs to be uninstalled first.
NOS Uninstall (if pre-installed)
To uninstall the current NOS, access ONIE from the GRUB menu and select the Uninstall OS option.
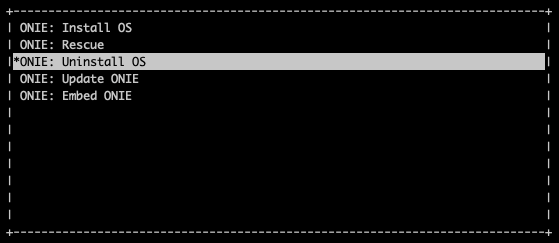
Once it’s done, the switch will automatically reboot and get ready for the installation of Dell SONiC.
NOS Install
If there is no DHCP in the management network, stop the onie-discovery service and configure an IP address and default gateway manually.
onie-discovery-stop
ip addr add <management IP address/prefix> dev eth0
ip route add default via <gateway of the management network>
echo "nameserver <DNS server address>" > /etc/resolv.conf
The Dell SONiC image should be available on a web server to which the switch has access through the local network or the Internet.
Example:
onie-nos-install http://192.168.100.10/Enterprise_SONiC_OS_4.1.1_Enterprise_Premium.bin
After completion of the installation, the switch will automatically reboot.
To login use the default username and password:
admin/YourPaSsWoRd
Set up the Out-of-Band (OOB) Management.
Upon the initial boot of the newly installed NOS, please wait until the message “System is ready” appears, typically resembling the following:
May 03 15:02:35.430469 System is ready
Once this message is displayed, proceed to disable ZTP using the following commands:
admin@sonic:~$ sonic-cli
sonic# configure
sonic(config)# no ztp enable
Wait once more until the “System is ready” message reappears. This may take approximately 1-2 minutes. If there isn’t a DHCP server available in the Out-of-Band (OOB) management network to ensure the switch’s connection to the internet, you’ll need to configure the Management IP address, gateway, and nameservers using the following commands:
admin@sonic:~$ sonic-cli
sonic# configure
sonic(config-if-Management0)# interface Management 0
sonic(config-if-Management0)# ip address <MGMT-IPv4>/<MGMT-SUBNET-MASK> gwaddr <MGMT-SUBNET-GATEWAY>
sonic(config)# exit
sonic(config)# ip name-server <DNS-SERVER1>
sonic(config)# ip name-server <DNS-SERVER2>
sonic(config)# end
sonic# write memory
sonic# exit
Netris agent installation.
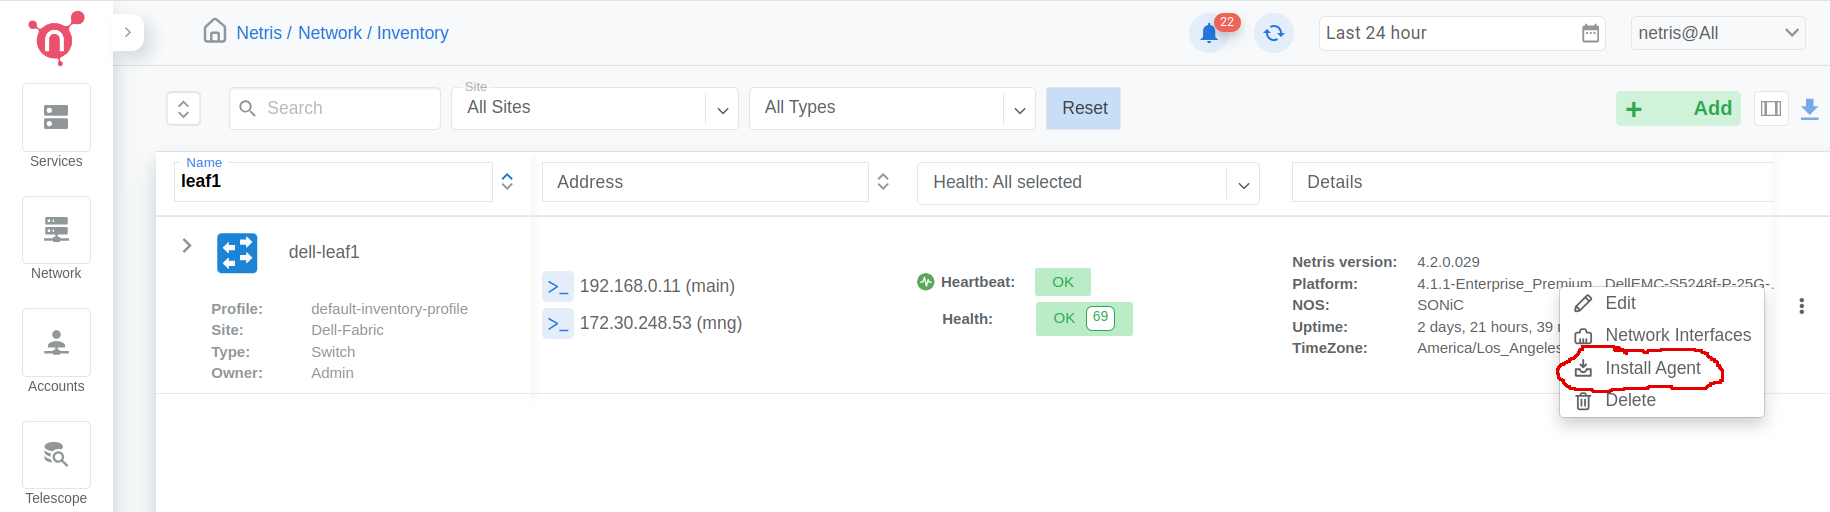
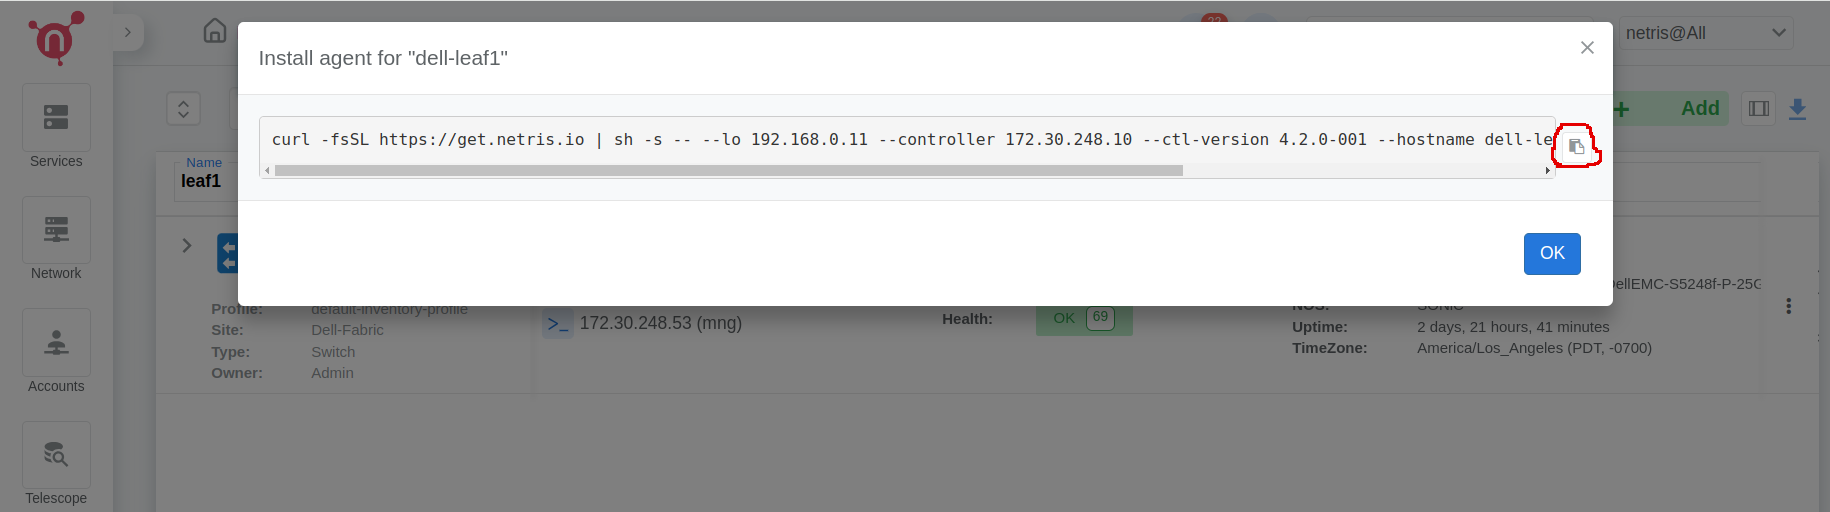
Navigate to the Net–>Inventory section and click the three vertical dots (⋮) on the right side of the switch you are provisioning. Then click Install Agent, copy the one-line installer command to your clipboard and paste in the switch.
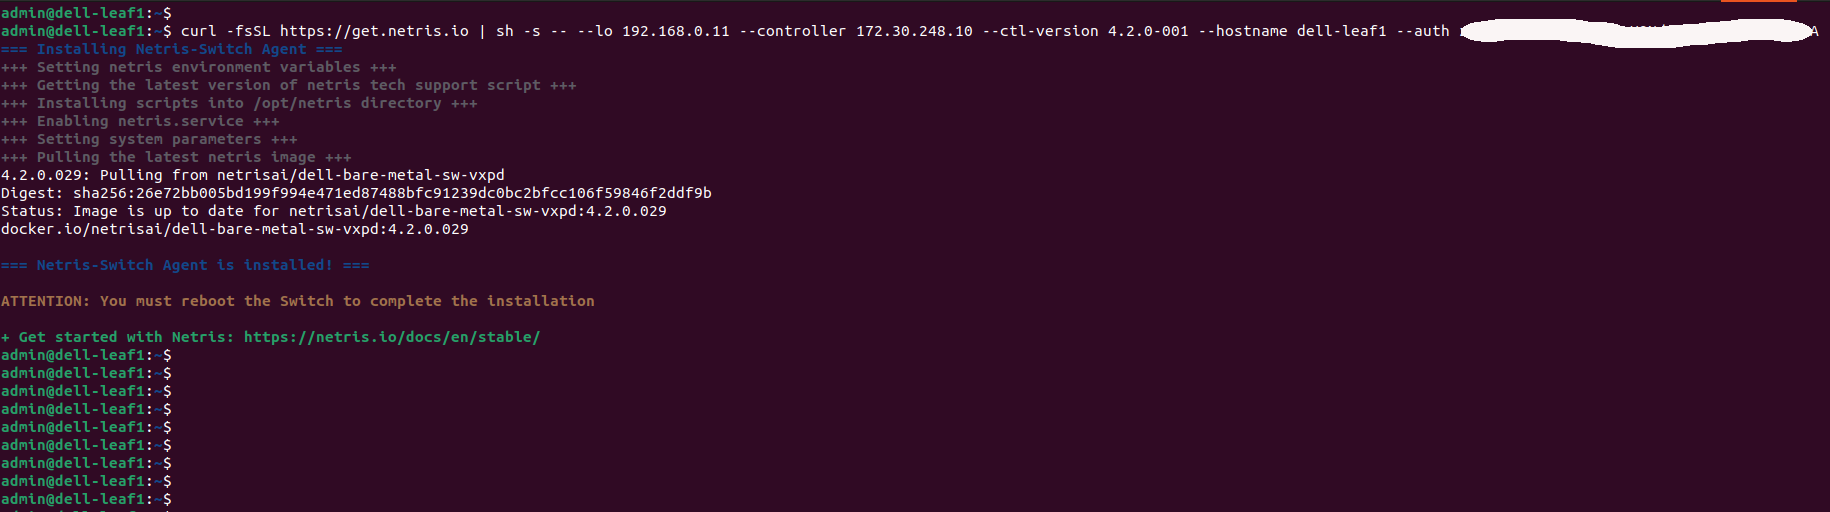
Reboot the switch
sudo reboot